

How to Change a Drive Belt: A Comprehensive Guide
Without question one of the most important pieces of hardware found on any modern UTV is it’s drive belt. These unassuming bands of reinforced rubber may not seem like a big deal but they actually play a huge role in your vehicle’s performance, power delivery and longevity. Failing to properly maintain and replace the drive belt on your UTV can have significant negative effects on your riding experience. Common symptoms of a worn out drive belt include reduced power, poor acceleration and even complete breakdowns in the middle of your riding adventure.
The goal of this guide is to guide you through the general process of changing a UTV drive belt, provide useful maintenance tips, and answer some frequently asked questions. By the end of this article, you'll have the knowledge and confidence to tackle this job on your own.

Overview & Introduction
During operation, your UTV's drive belt finds itself under a great deal of heat and stress. This can cause wear and tear over time, gradually stretching, fraying and ultimately snapping the belt. Maintaining best performance and avoiding unplanned breakdowns depend on routine examination and quick replacement of your drive belt.
With the proper tools and knowledge, many riders can change the drive belt on their UTV. Not only will you save money on mechanic bills, but performing your own belt maintenance will help you gain a better grasp of your vehicle's internal workings. Not to mention the sweet satisfaction that comes with the successful completion of a new DIY job.
Your riding style, terrain, and particular type of your UTV will all affect the frequency of belt changes. Generally speaking, it's smart to check your belt once a season or at least once every 500–1000 miles.
Tools and Materials Needed
Before you begin the process of changing your UTV's drive belt, it's essential to gather all the necessary tools and materials. Having everything on hand before you start will make the job smoother and more efficient. Here's a general idea of what tools you'll want to have with you:
- New Replacement Belt
- Socket set and ratchet
- Screwdrivers (both flathead and Phillips head)
- Pliers
- Belt tension gauge
- Clean rags
- Penetrating oil (for loosening stubborn bolts)
- Work gloves
- Safety glasses
- Jack and jack stands (if needed to lift the UTV)
- UTV manual (for reference on specific procedures for your model)
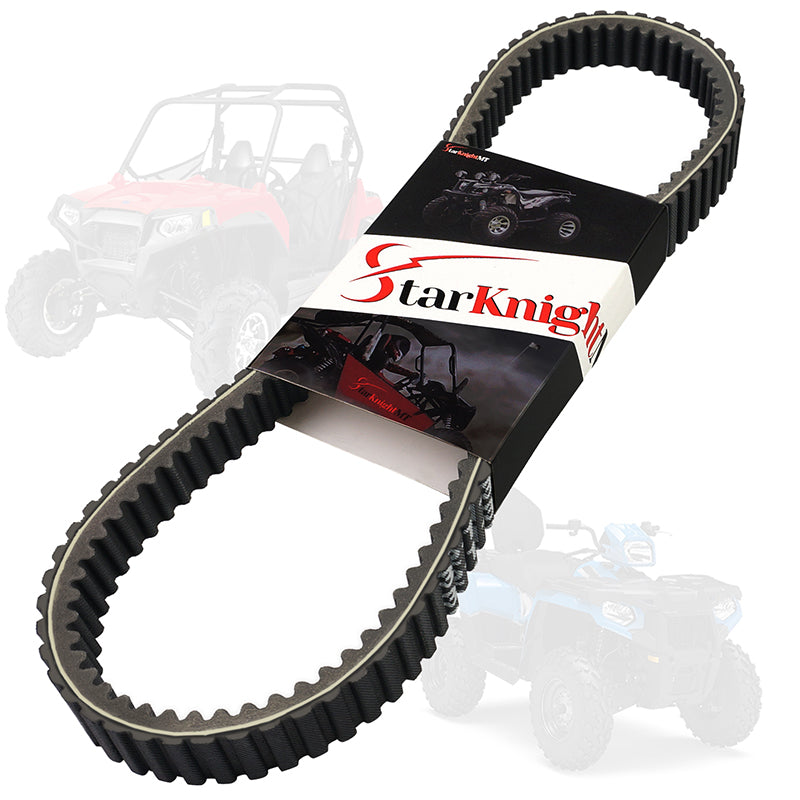
It is worth noting that when it comes to selecting a new drive belt, quality counts. Choosing a high-quality belt, such as those sold by us at Star Knight, will dramatically improve your UTV's performance and increase the duration between changes.
Detailed Process of Changing a UTV Belt
Now that you have all your tools and materials ready, let's dive into the step-by-step process of changing your drive belt. Remember, while these steps are generally applicable, always consult your UTV's manual for model-specific instructions.
Preparation
- Ensure your UTV is on a level surface and engage the parking brake.
- If necessary, use a jack to lift the UTV and secure it with jack stands.
- Allow the engine and exhaust system to cool completely before starting work.
- Remove any body panels or covers that obstruct access to the drive belt area.
Removing the Old Belt
- Locate the CVT (Continuously Variable Transmission) housing. This is typically near the rear of the engine.
- Remove the CVT cover bolts and carefully take off the cover.
- Inspect the old belt for signs of wear, such as cracks, fraying, or glazing. This can help you identify potential issues that may have caused premature wear.
- Rotate the secondary clutch to create slack in the belt.
- Carefully work the old belt off the clutches, starting with the secondary clutch and then moving to the primary clutch.
- Once removed, compare the old belt to the new one to ensure you have the correct replacement.
Installing the New Belt
- Clean the clutch surfaces with a clean rag to remove any debris or rubber residue from the old belt.
- Begin installing the new belt by placing it over the secondary clutch first.
- Work the belt onto the primary clutch, ensuring it's seated properly in the grooves of both clutches.
- Rotate the secondary clutch to tension the belt.
- Use a belt tension gauge to check that the belt tension is within the manufacturer's specifications.
- Manually rotate the clutches to ensure the belt tracks properly and doesn't rub against any components.
- Reinstall the CVT cover, making sure all bolts are tightened to the correct torque specifications.
- Replace any body panels or covers you removed earlier.
Remember, proper installation is crucial for the longevity and performance of your new drive belt. Take your time and double-check each step to ensure everything is correctly in place.
Maintenance Tips
Proper maintenance can significantly extend the life of your UTV's drive belt and improve overall vehicle performance. Here are some essential tips to keep in mind:
- Regular Inspections: Check your drive belt for signs of wear or damage before each ride. Look for cracks, fraying, glazing, or any unusual wear patterns.
- Keep It Clean: After riding in muddy or dusty conditions, clean the belt and clutch area to prevent abrasive particles from causing premature wear.
- Proper Break-In: If you've installed a new belt, follow the manufacturer's break-in procedure. This usually involves avoiding high speeds and heavy loads for the first 30-50 miles.
- Avoid Overloading: Exceeding your UTV's weight capacity can put extra stress on the drive belt, leading to premature wear.
- Use Low Gear: When tackling steep inclines or pulling heavy loads, always use low gear to reduce stress on the belt.
- Allow for Cooling: After high-speed or heavy-load operation, allow your UTV to idle for a few minutes before shutting it off. This helps dissipate heat from the belt and clutches.
- Proper Storage: If storing your UTV for an extended period, consider loosening the belt tension to reduce stress on the fibers.
By following these maintenance tips, you can ensure that your UTV's drive belt remains in top condition, providing reliable performance ride after ride.
Conclusion
Changing your UTV's drive belt may appear difficult at first, but with the proper tools, expertise, and patience, most UTV owners can get this job done in a relatively short time. Regular belt maintenance and replacements are critical to keeping your vehicle running smoothly and avoiding unexpected problems on the trail.
Remember that the quality of your replacement belt matters. Choosing a high-quality belt, like as those supplied by Star Knight MT, can improve both the performance of your UTV and the belt's lifetime.
By taking the time to learn and repair your UTV's drive belt, you not only save money on service bills, but you also develop a better understanding of your vehicle and ensure endless hours of trouble-free riding adventures.
Frequently Asked Questions (FAQs)
-
Q: How often should I replace my UTV's drive belt?
A: The frequency of belt replacement depends on various factors such as riding conditions, maintenance, and the specific UTV model. As a general rule, inspect your belt every 500-1000 miles or at least once a season. Replace it if you notice signs of wear or damage, or follow the manufacturer's recommended replacement interval.
-
Q: Can I use any drive belt, or does it need to be a specific type?
A: It's crucial to use a drive belt that's specifically designed for your UTV model. Using the wrong type or size of belt can lead to poor performance and potential damage to your vehicle. Always consult your UTV's manual or a reputable parts supplier to ensure you're getting the correct belt.
-
Q: What are the signs that my UTV's drive belt needs replacement?
A: Common signs include a squealing noise when accelerating, decreased power or acceleration, visible cracks or fraying on the belt, and a burning rubber smell. If you notice any of these symptoms, it's time to inspect and potentially replace your drive belt.
-
Q: Is it normal for a new drive belt to smell when first installed?
A: It's not uncommon for a new drive belt to have a slight odor during the break-in period. However, if you notice a strong burning smell or see smoke, stop riding immediately and check the belt installation.
-
Q: Can I stretch or adjust my UTV's drive belt if it becomes loose?
A: No, UTV drive belts are not designed to be stretched or adjusted. If your belt has become loose, it's likely worn out and needs replacement. Attempting to stretch or adjust a drive belt can lead to poor performance and potential damage to your UTV.


Leave a comment